This project requires having an elk stack up and running. For our project, we have 3 servers
The elk server with elasticsearch and kibana install with IP address( 192.168.208.132)
The fleet server with IP address (192.168.208.134)
The web server where we gonna run our nodejs app
For our demonstration, we use elk version 8.5.2. In our journey, we will show you how to monitor a simple nodejs app with the elk apm.
To monitore your application, you have to create a fleet server in kibana. we will follow the steps below.
1) we have to create the fleet server, so we need to go into our kibana and in the menu on the left, click on fleet.
2) On the fleet page we have to click on settings and create hosts. this will allow us to configure the fleet server. In our case, it is an ubuntu server with the fleet server IP address 192.169.208.134.
3) We have to configure the ip address for our fleet server like below
4) For the output part we have to configure our elk IP address and because we do not use our own certificate, we have to add the flag ssl.verification_mode: none.
This command tells elastic to do not to verify the SSL certificate that it receives. It is obvious that it is not something to do in a production environment.
you have to choose a name for your policy and add the fleet server.
5) after adding the fleet server, we have to add an agent. this part will give you the command to run on your fleet server (192.168.208.134). In the deployment mode section, you have to choose quick start because in the beginning, we didn't configure any certificate.
After following all these steps, kibana will provide the command to run on your fleet server at the bottom of the page.
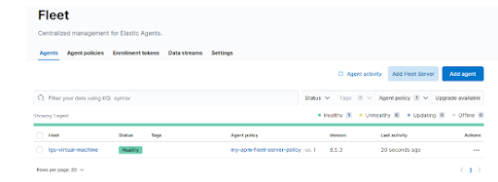
Remember to choose the commands related to your distribution. A simple copy-paste will get your server run and you will see your fleet server appear on the kibana page like below.
Now that you got your fleet and agent running. You will need to configure the integration.
Go to the menu on the left and go to the observability part and click on APM
You will get the page below and click on integration and add elastic APM
This will bring you to the page below,
you have to put the ip address of your fleet server and name the integration. Since you already create an agent policy, at the end of the page, click on the existing host and choose the policy you created and create the agent
On the page (Add elastic integration APM), you can give a name to the integration.
For the server configuration, you can replace localhost with the IP address of your fleet server.
In the part where to add your integration, select the existing host and choose and select the agent policy that we configure at the beginning. and click save and configure
The agent should appear in the agent table
In the web server
Now we are done with the configuration in kibana. We have to create a basic nodejs app that will send the traces to the fleet server.
- install nodejs ( apt install nodejs )
- install npm ( apt install npm)
- intstall the elastic-apm-node ( npm install elastic-apm-node --save)
create a file apm.js, you can find the code below. You can run the nodejs application with the command the command node app.js
var apm = require('elastic-apm-node').start({
serviceName: 'mon test apm',
serverUrl: 'http://192.168.208.134:8200',
environment: 'production'
})
const express = require ('express')
const app = express()
const port = 3030
app.get('/',(req,res) => {
res.send(' hello world')
})
app.get('/demo',(req,res) => {
res.send(' welcome demo for apm test')
})
app.listen(port, () => {
console.log (' App lsiten on port 3030')
})
at this moment your server runs the nodejs app and each time you make a request to your server, in our example you can run the command
- curl 192.168.208.133:3030
- curl 192.168.208.133:3030/demo
The trace of the nodejs server will display in your kibana instance


Comments
Post a Comment